The store will not work correctly in the case when cookies are disabled.
Litter-Robot 4: Yellow ping-pong light bar (Pinch detect)
IMPORTANT
- Make sure your unit is plugged in.
- Make sure your unit is connected and online.
- Make sure your firmware is up-to-date. If the app does not give you the option to update, you have the latest version.
Preparation
Litter-Robot is equipped with anti-pinch sensors on both sides of the waste drawer chute to ensure your cat’s safety while in use. These sensors monitor for potential pinch conditions at all times.
If your unit displays a yellow ping-pong light bar, this indicates that the anti-pinch sensors have been activated.
You will also receive a notification on your phone if you use the Whisker app.
While cycling, the globe will stop and retract for five seconds. After a two-second pause, the unit will attempt to continue the cycle. After three attempts, it will stay in this position until it’s powered off/on or the error is cleared.
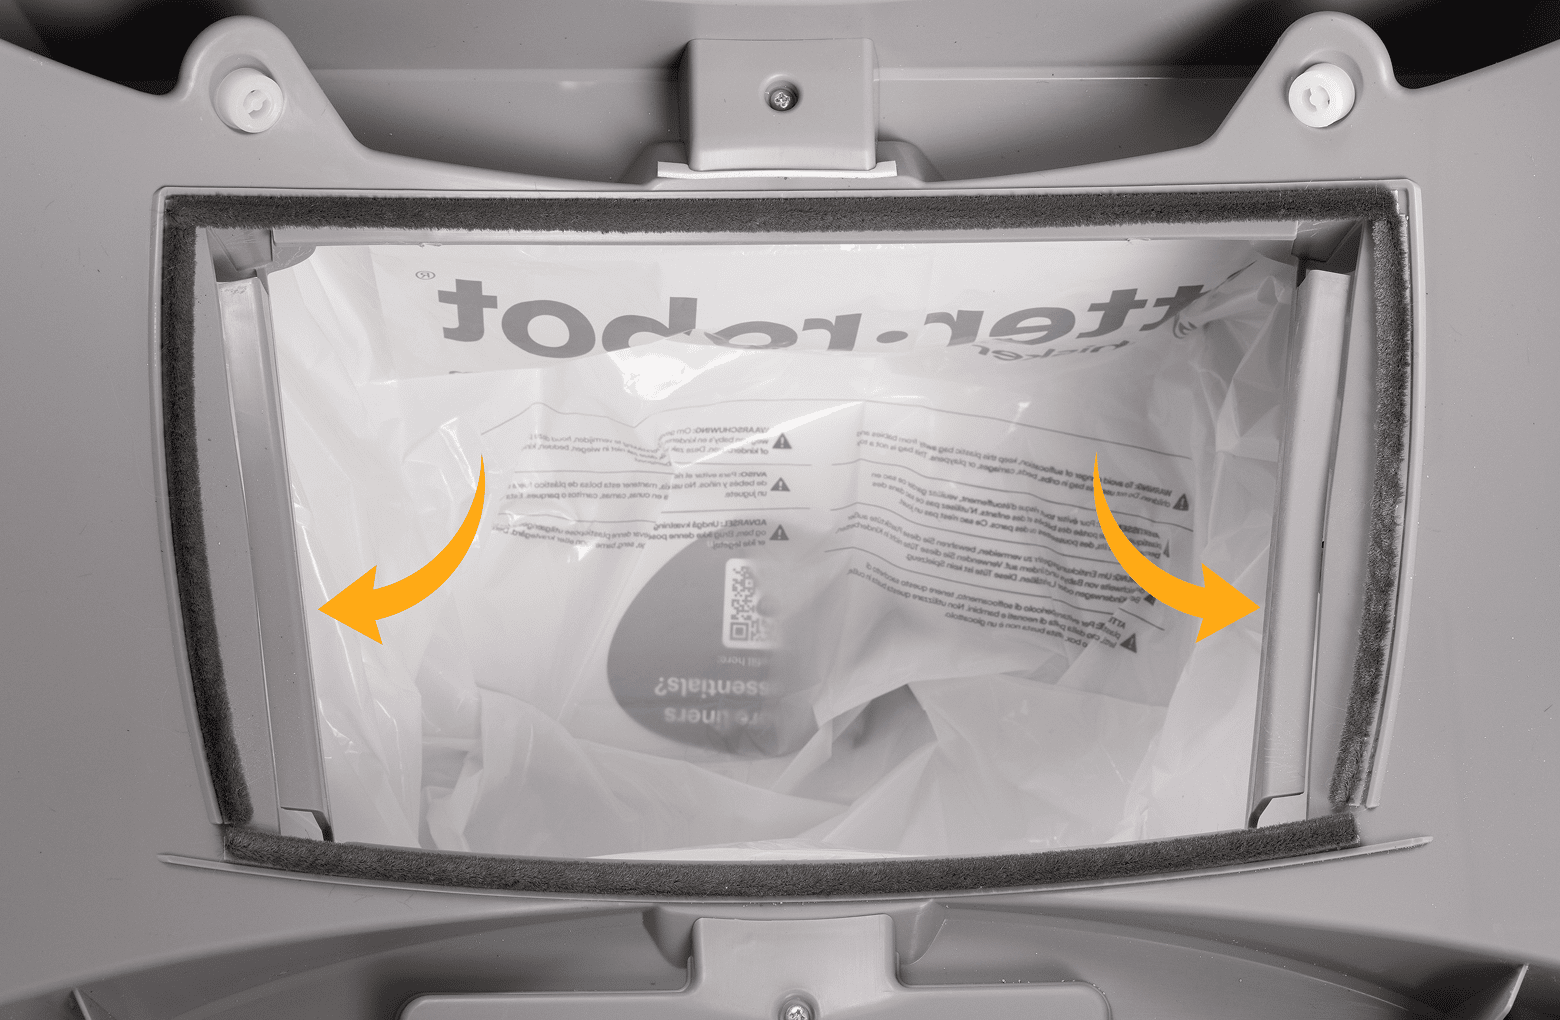
- First, let’s check inside the waste drawer to see if there are any foreign objects that could be activating the sensors.
![]()
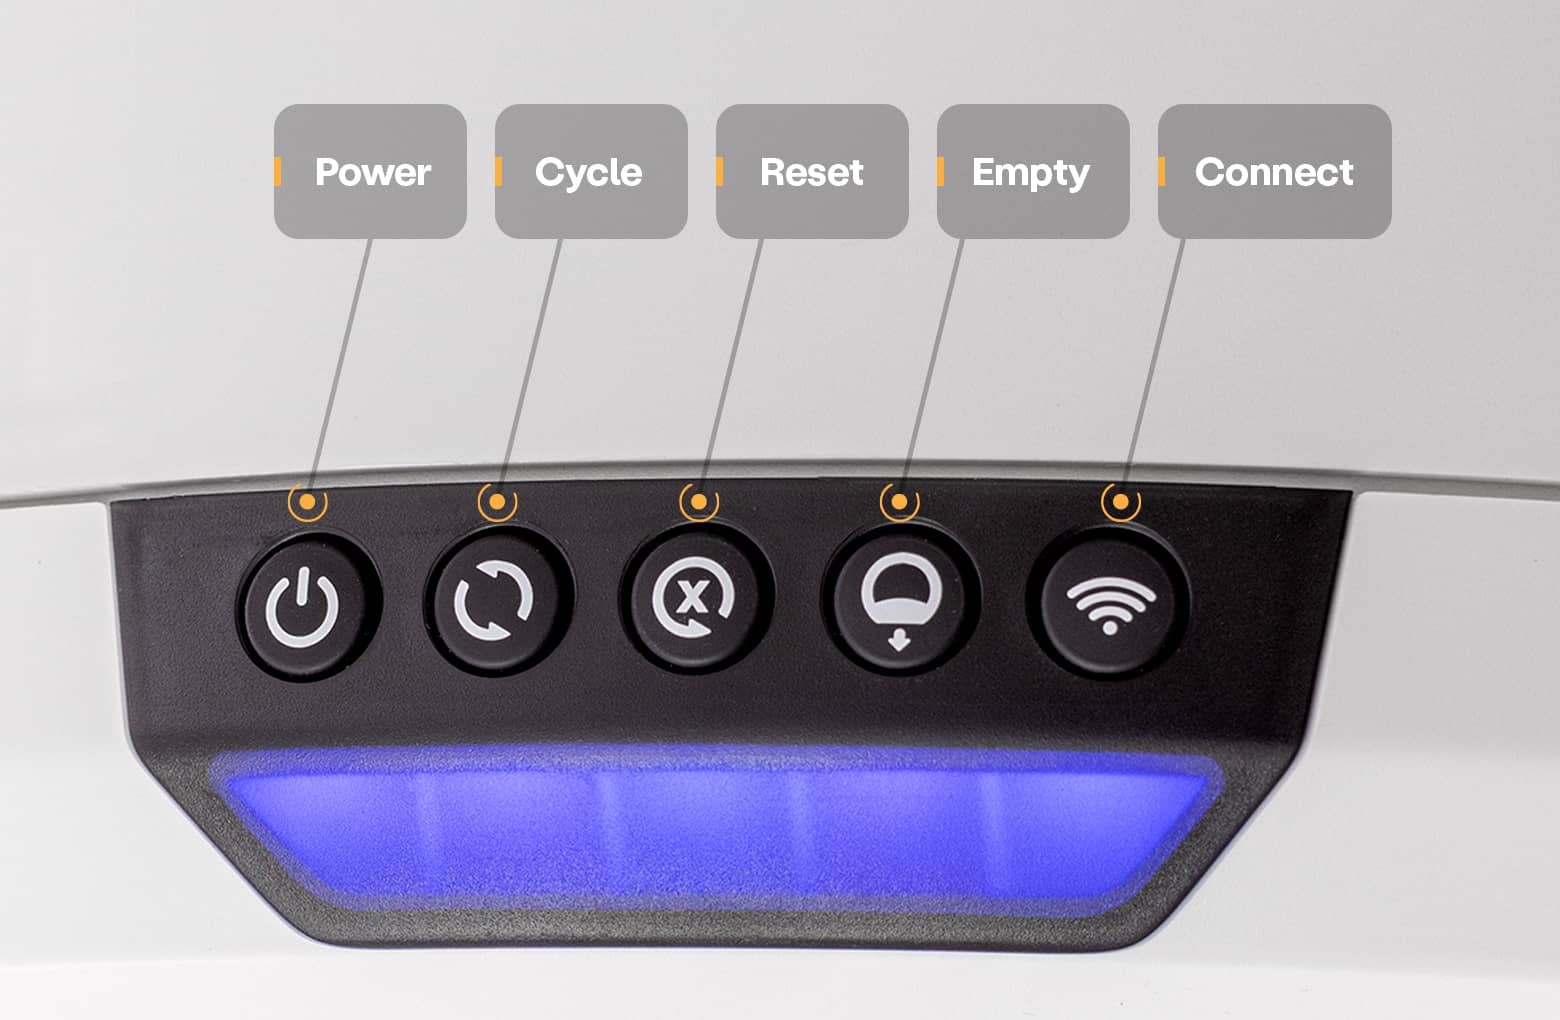
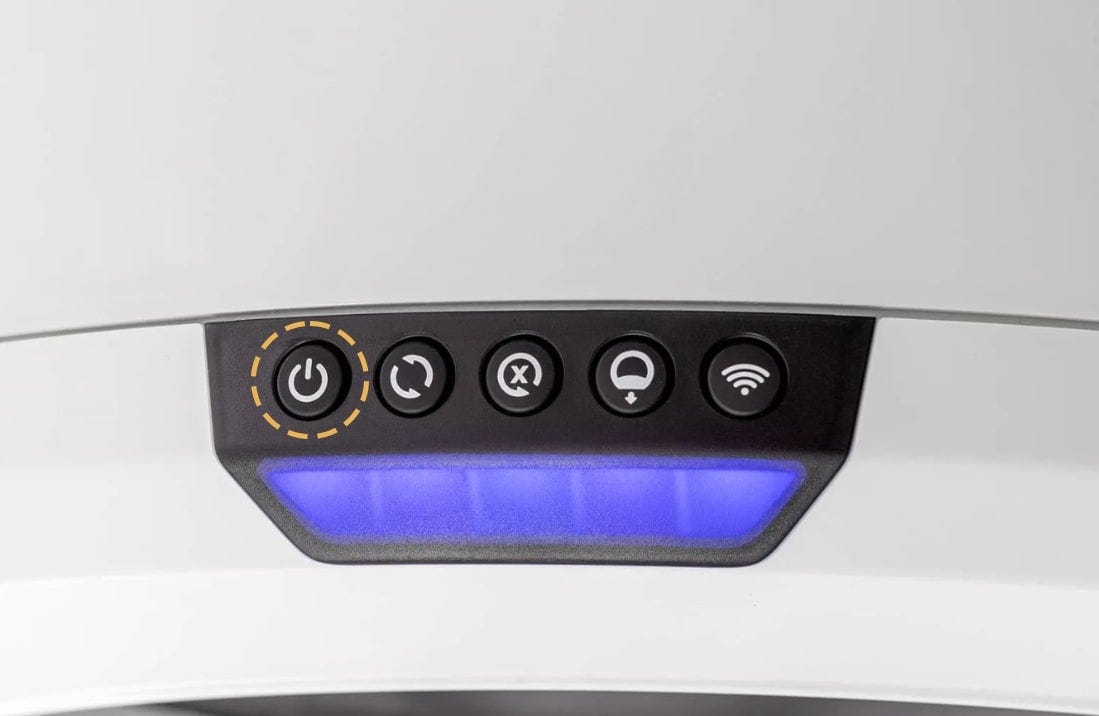
- Now, let's run a test cycle. Short press the Reset button, then short press the Cycle button to run a Clean cycle.
![]()
- After the test cycle, Litter-Robot should be in the Home position displaying a blue light bar.
Successful: If your unit displays a blue light bar, you've been successful.
Unsuccessful: If you are still seeing a yellow ping-pong light bar, please continue.
Troubleshooting
Let’s check for any additional items or debris that might be contacting the anti-pinch sensors.
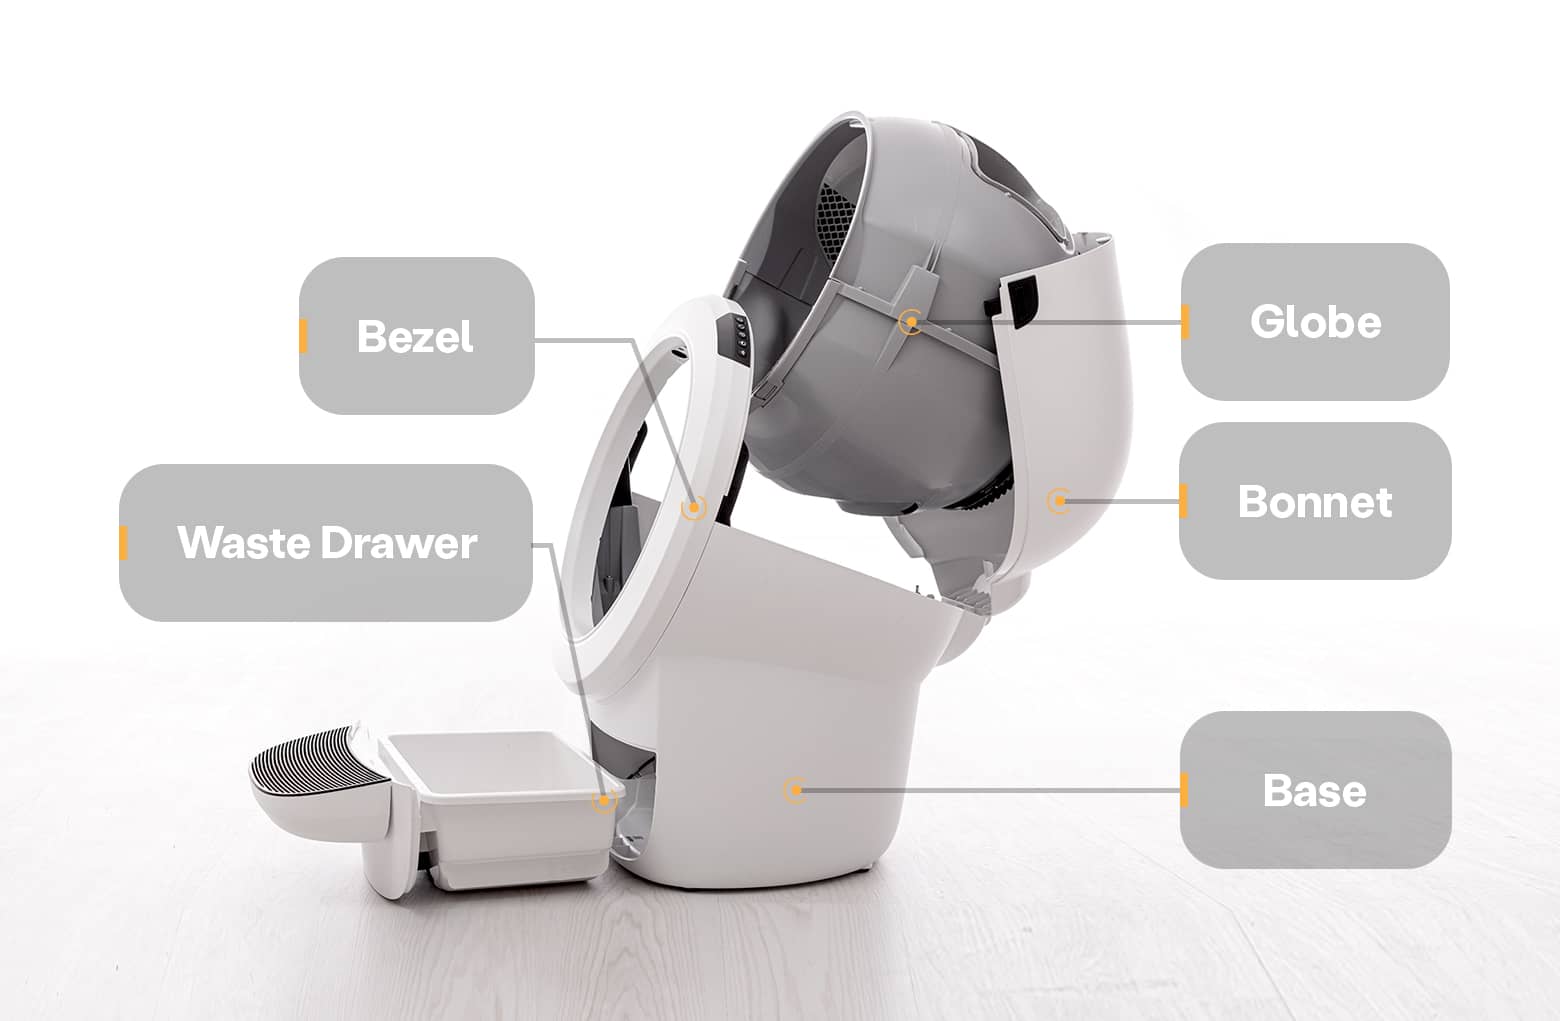
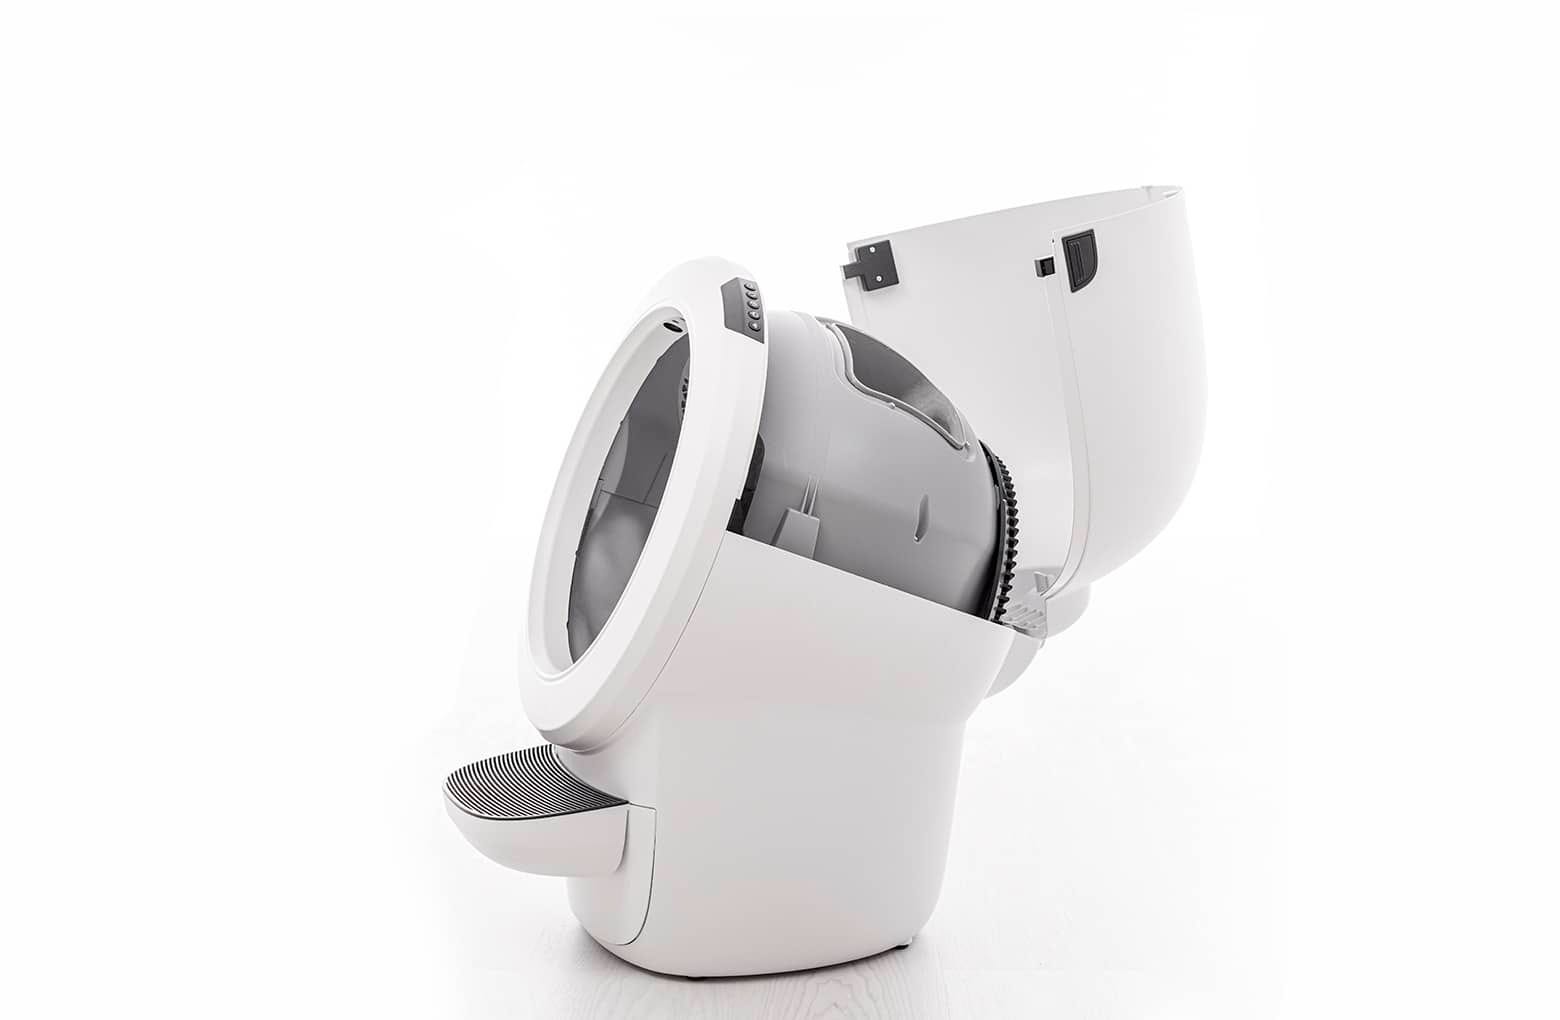
- First, we will remove the bonnet and globe to look for any issues.
![]()
- Make sure the unit is in the Home position.
![]()
- Press the Power button to turn the unit off, then unplug the unit from the wall.
![]()

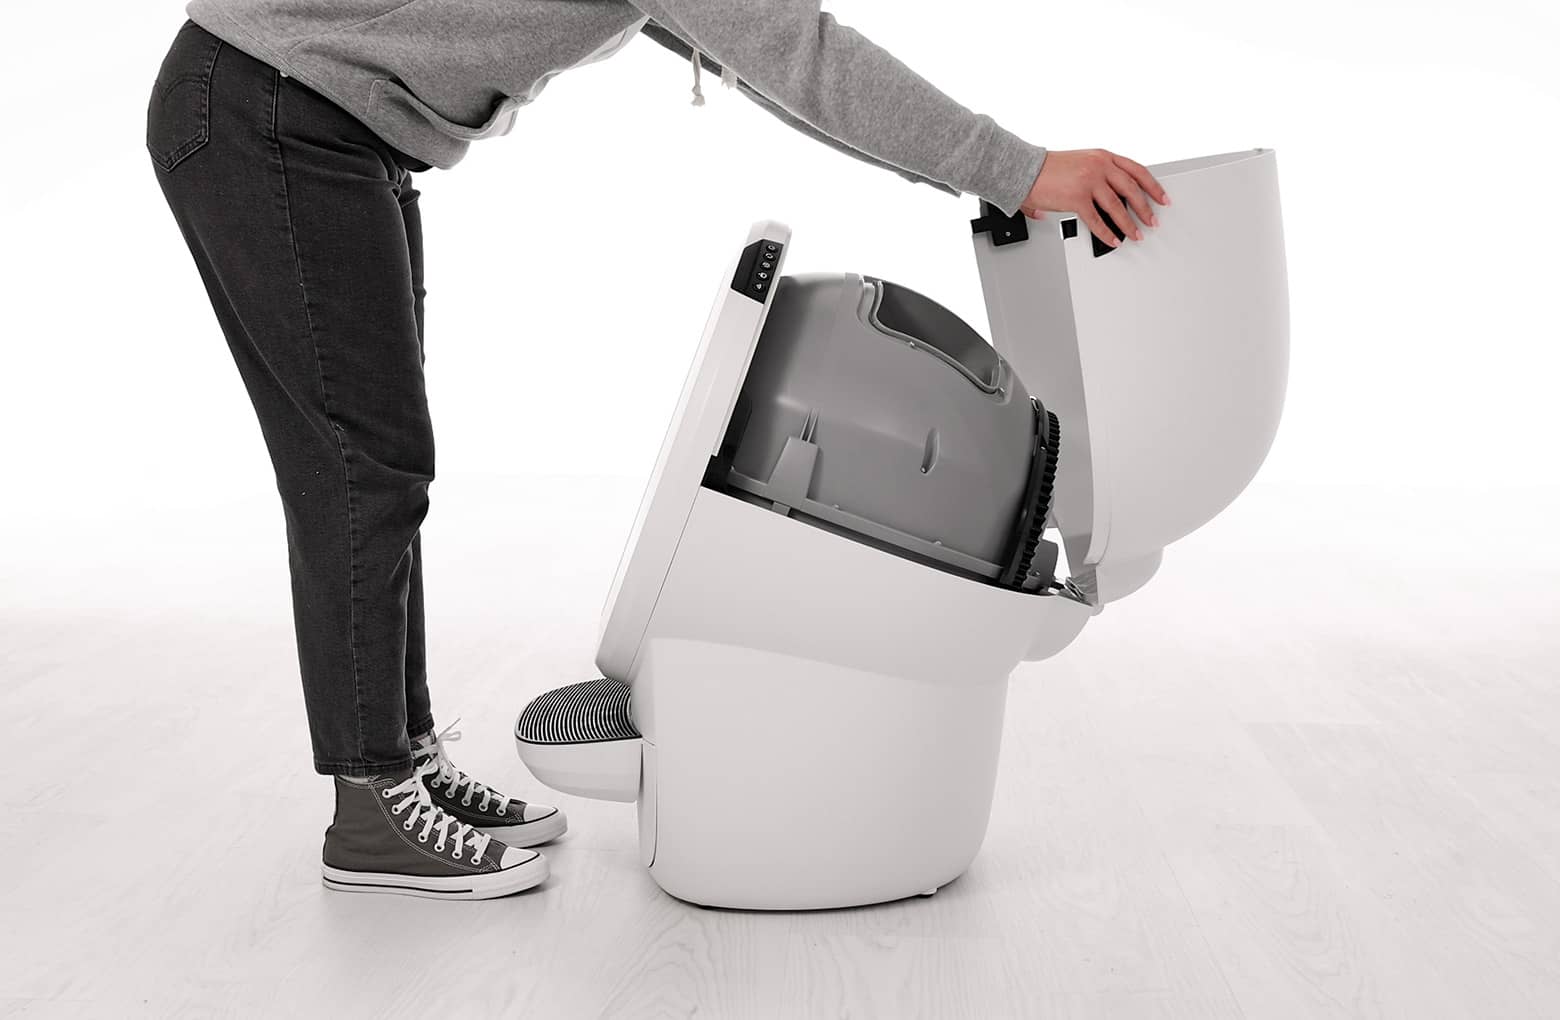
Removing the bonnet
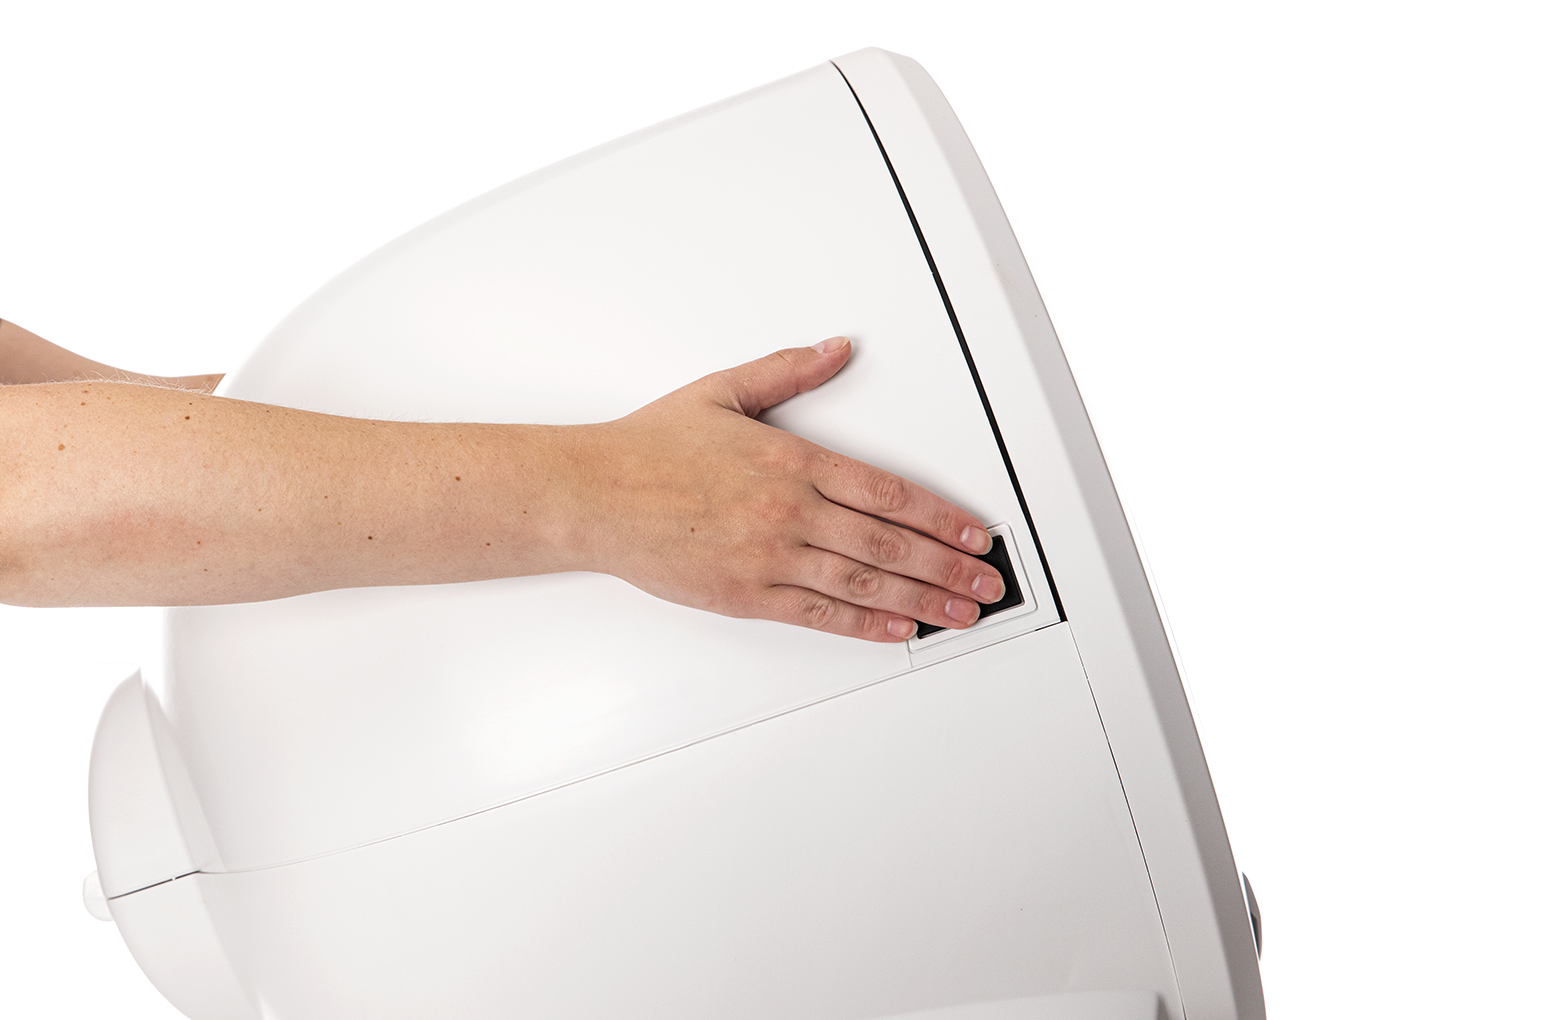
- To open the bonnet, press and hold the latches on both sides of the bonnet, then lift and rotate the bonnet to its open position.
![]()
- Set the bonnet aside.
- If you have a fence installed, remove this from the bezel.
![]()
Note: Typically need to remove the bonnet completely only during deep cleaning or bonnet replacement.
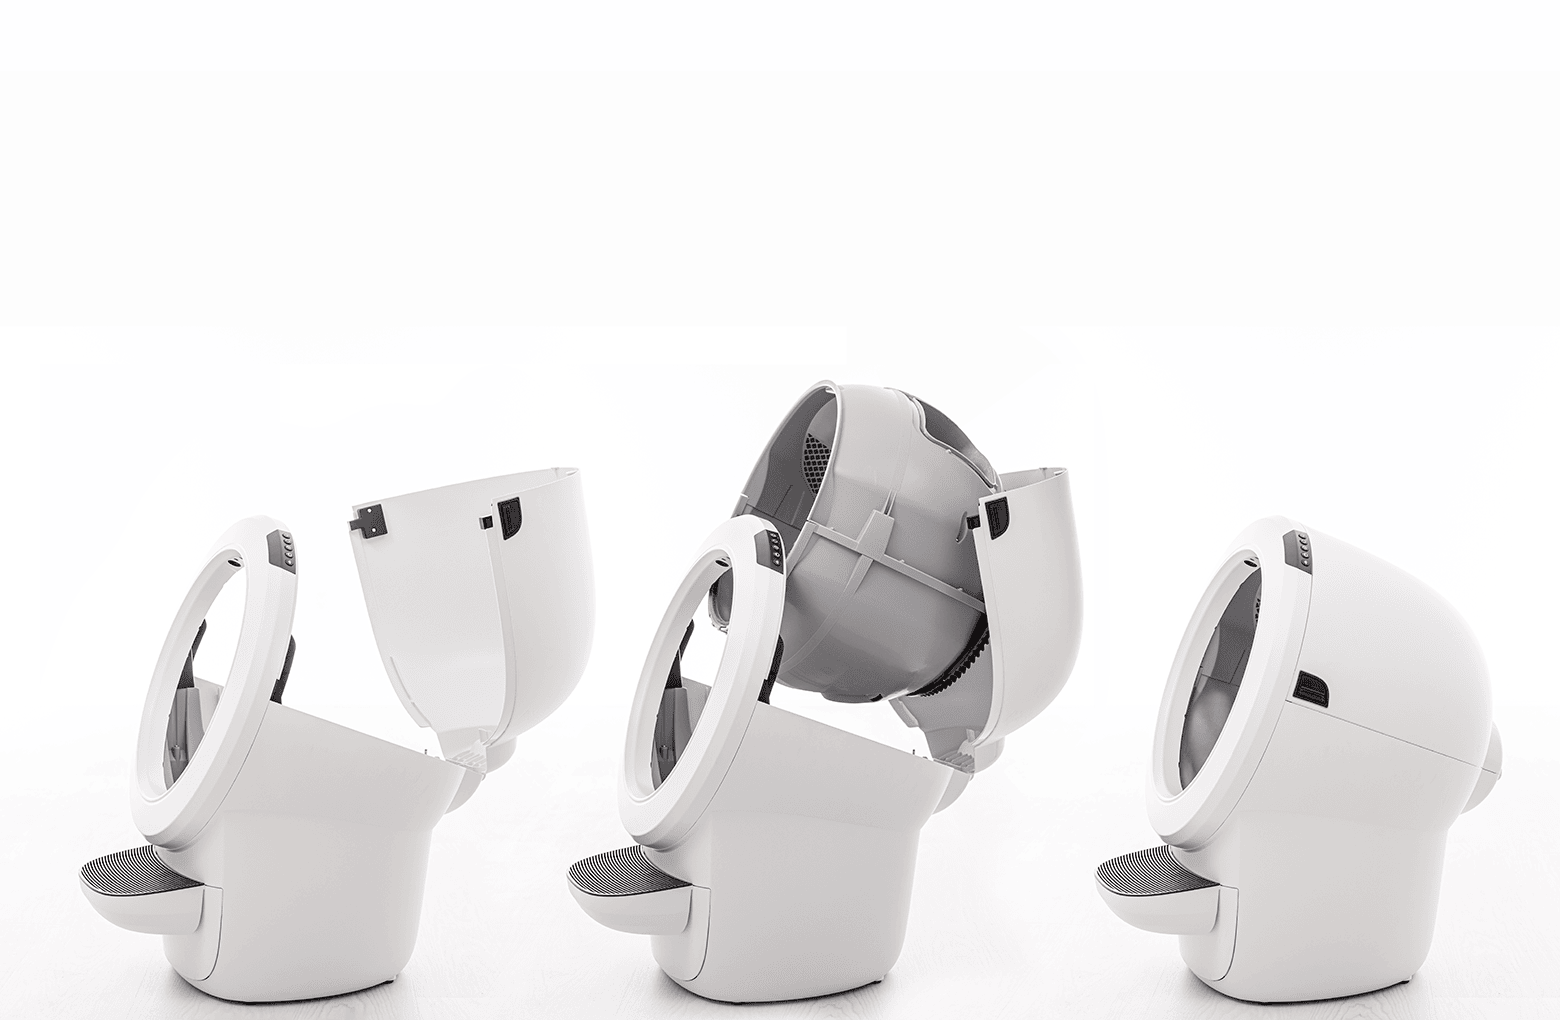
Removing the globe
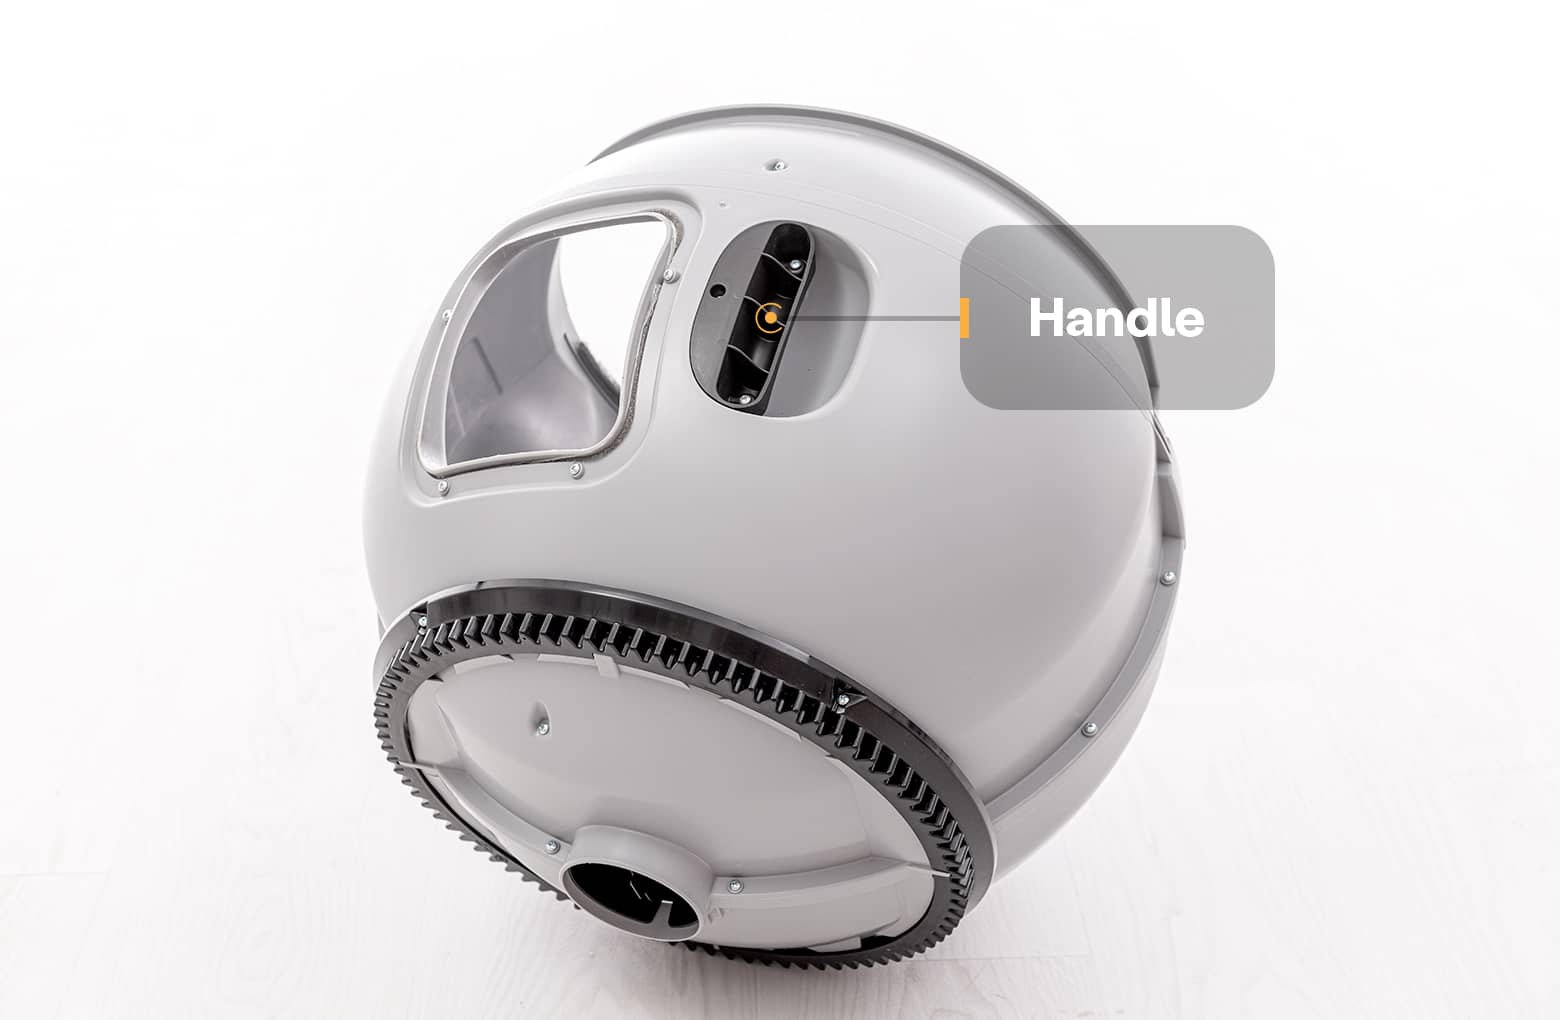
- To remove the globe, grab the black handle located on top of the globe, lift the globe out of the base, and set it aside.
![]()
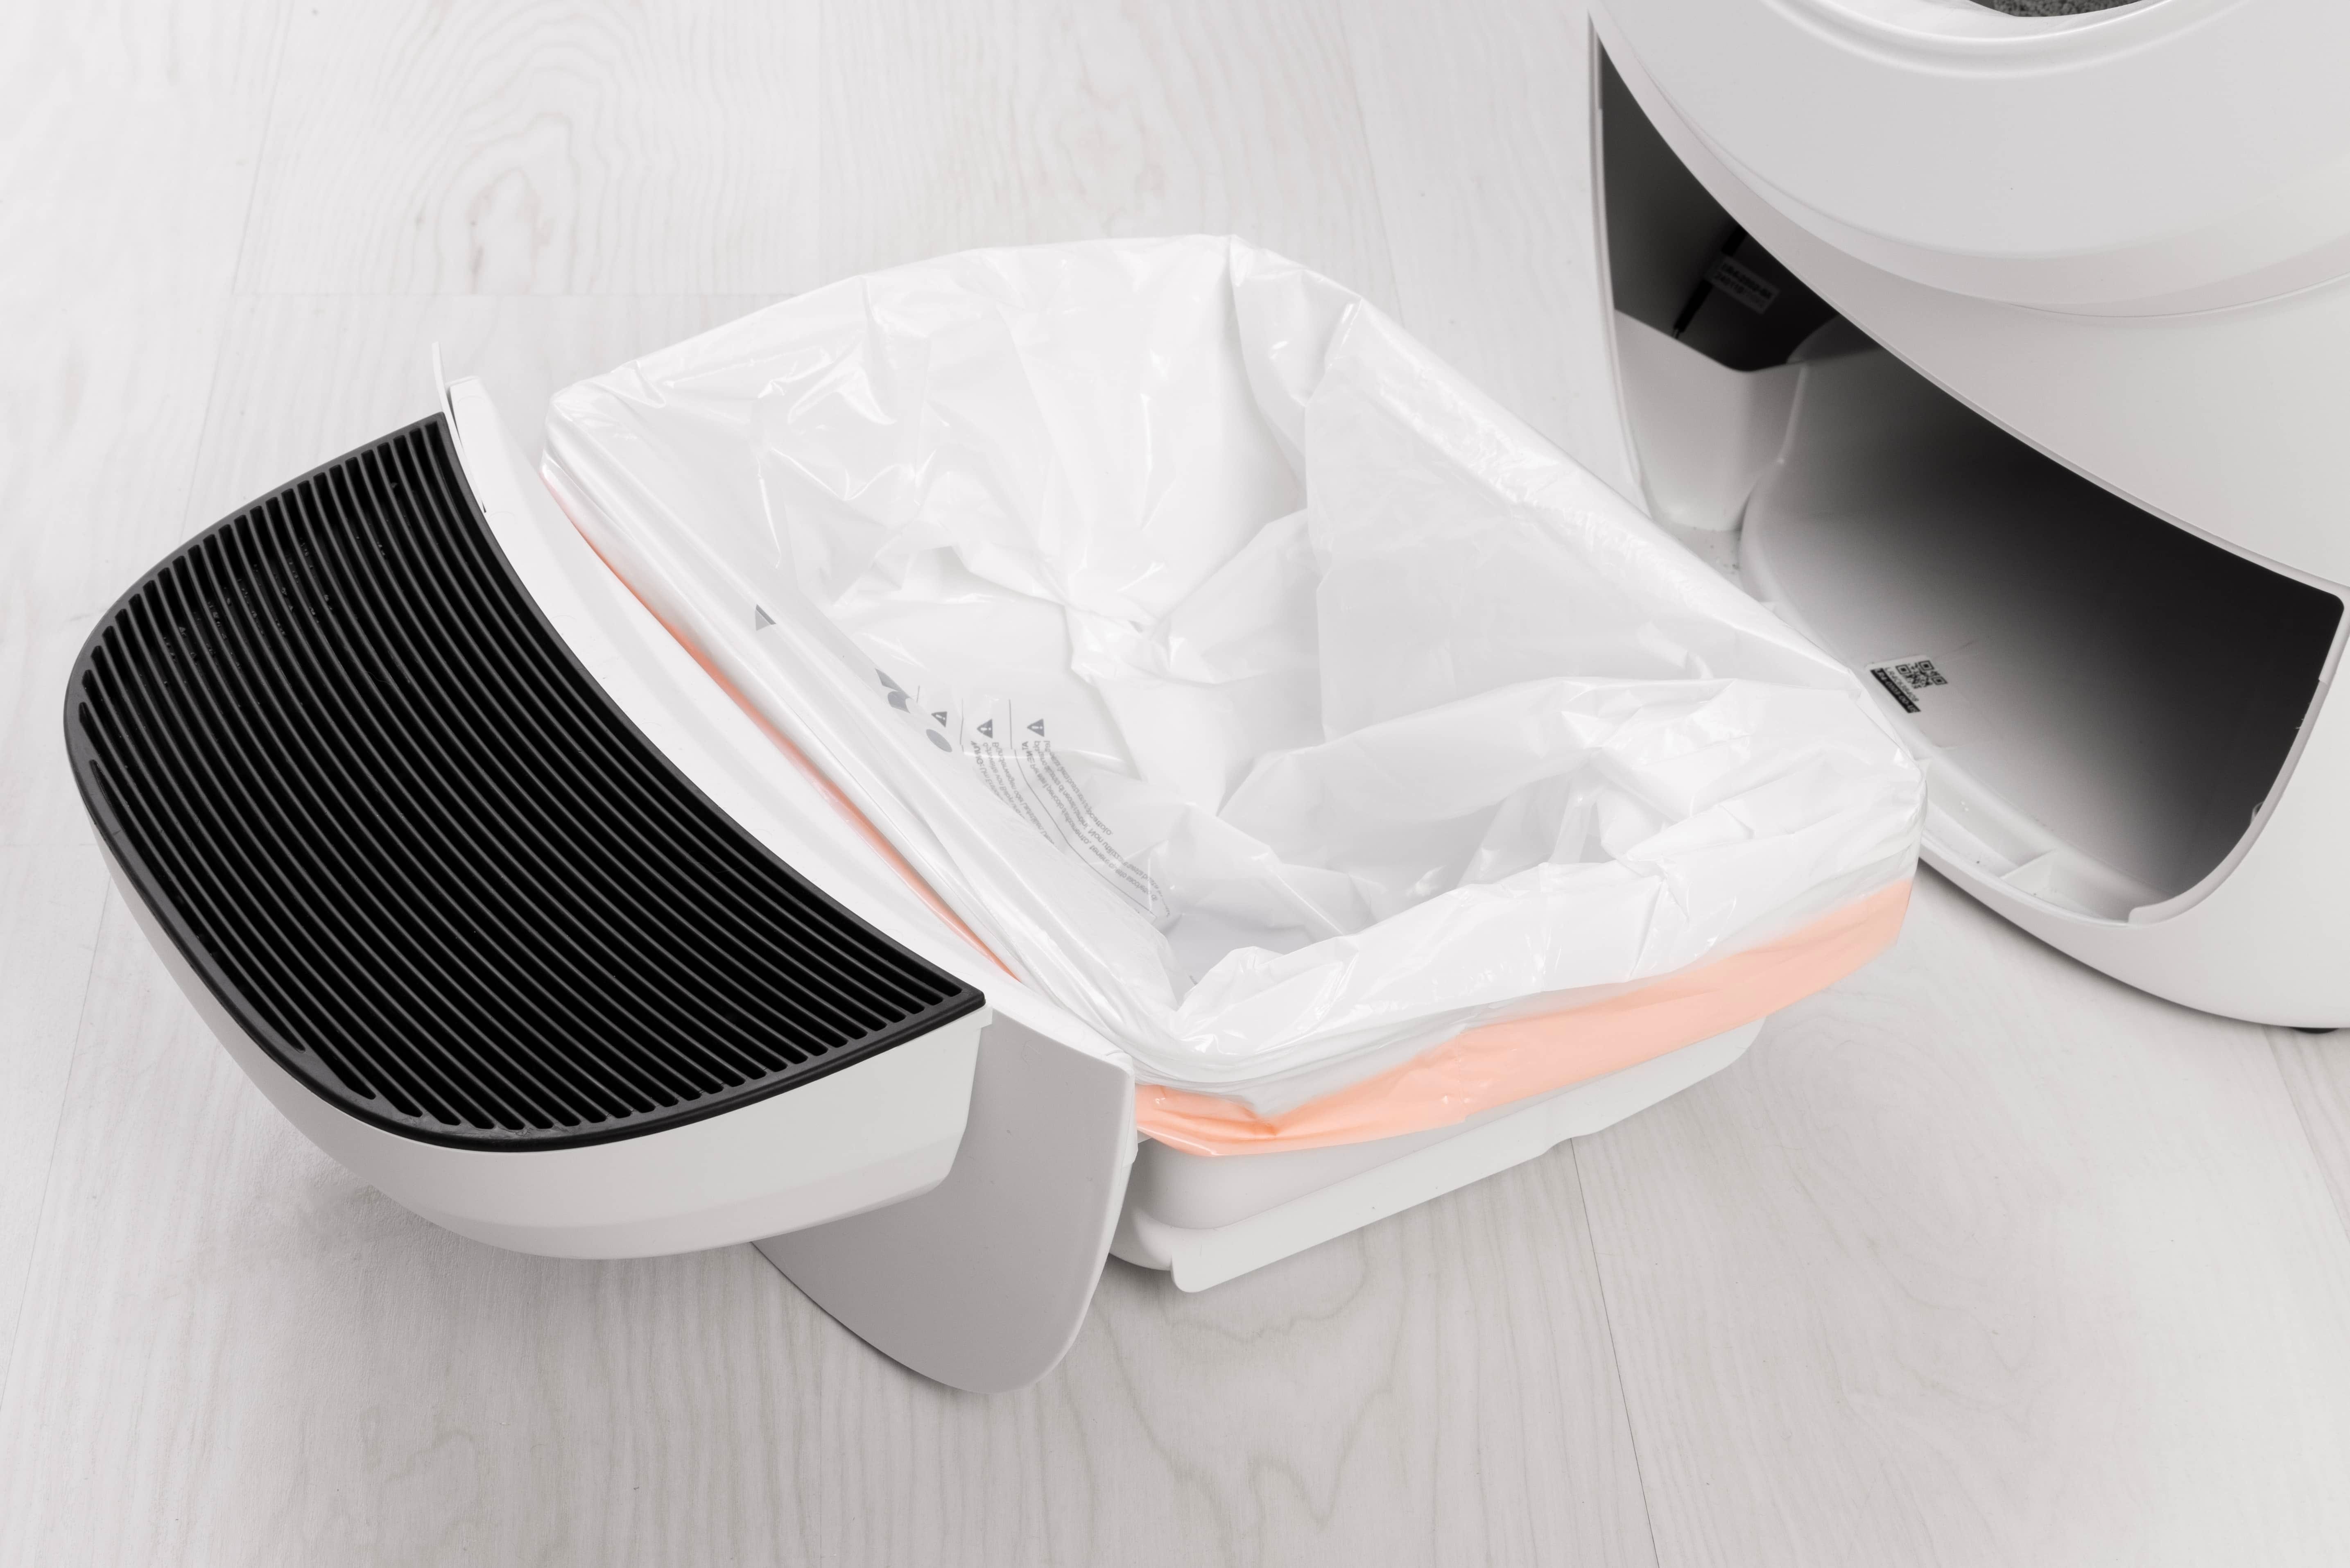
- Remove the waste drawer and empty it or set it aside.

A firm, level surface is required for accurate detection of cats and weight readings.
Inspecting the anti-pinch sensors
The anti-pinch sensors are located at the sides of the dump port within the base. These are active at all times to ensure we can detect any motion within the drawer.
- Make sure both pinch bars are free of debris and clean.
- Press inward on each of the pinch bars. You should hear an audible click. This ensures the anti-pinch sensors are working properly.
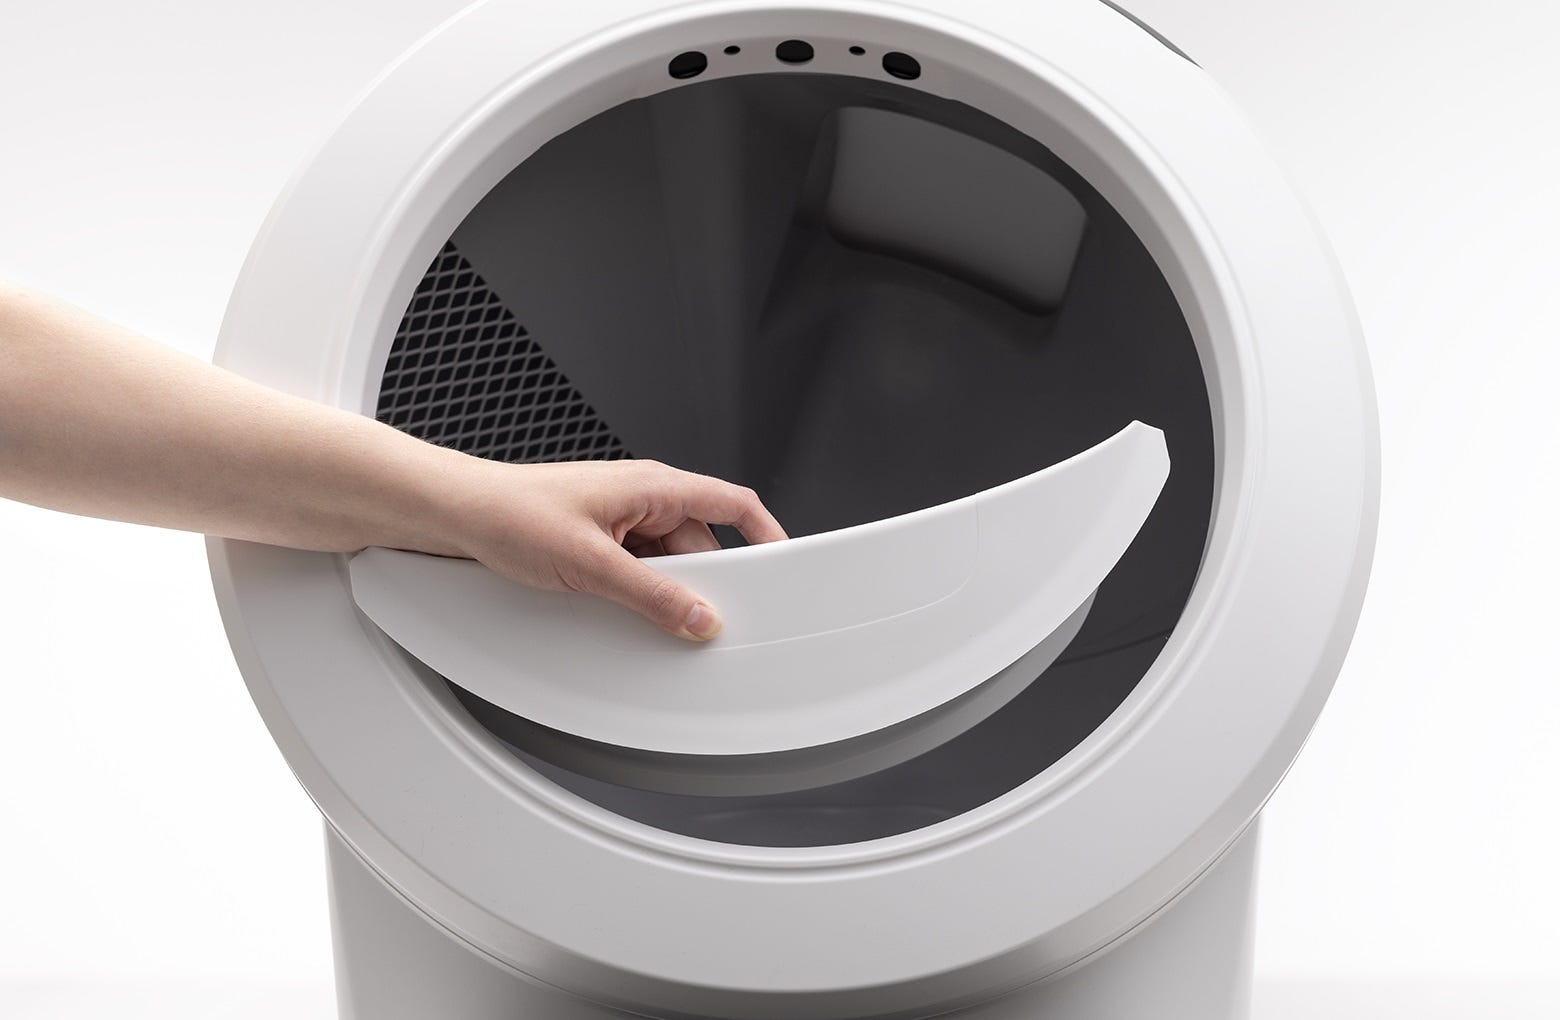
Inspecting the carbon filter
The carbon filter is located on the underside of the globe. If it is not fully seated, it is possible that it may have contacted an anti-pinch sensor during the cycle.
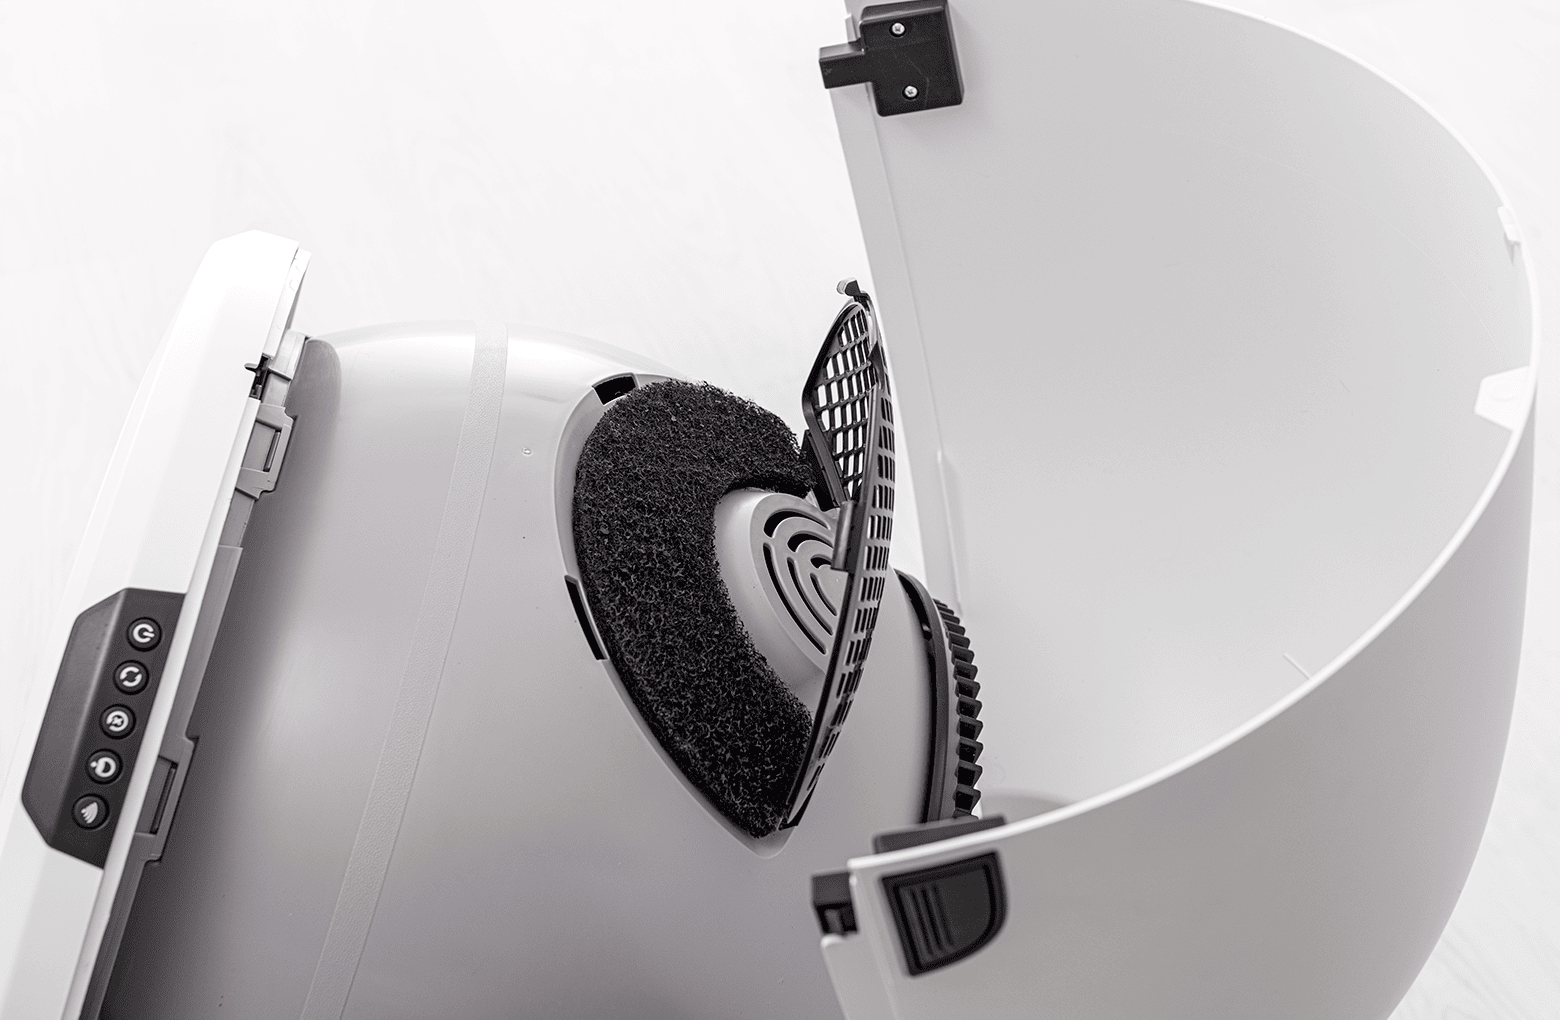
- Make sure the filter cover is fully seated and has not popped out during shipping or cleaning.
- Check for and remove any obstructions around the waste port hole and in the globe track.
![]()

Now that we’ve checked for any obstructions let’s re-install the globe and bonnet and check for proper operation of the unit.
Installing the globe
- To install the globe, hold the globe by the black handle and set it into the base.
![]()
- When installing the globe, keep the globe handle and waste port oriented toward the top to ensure the globe is close to the Home position.
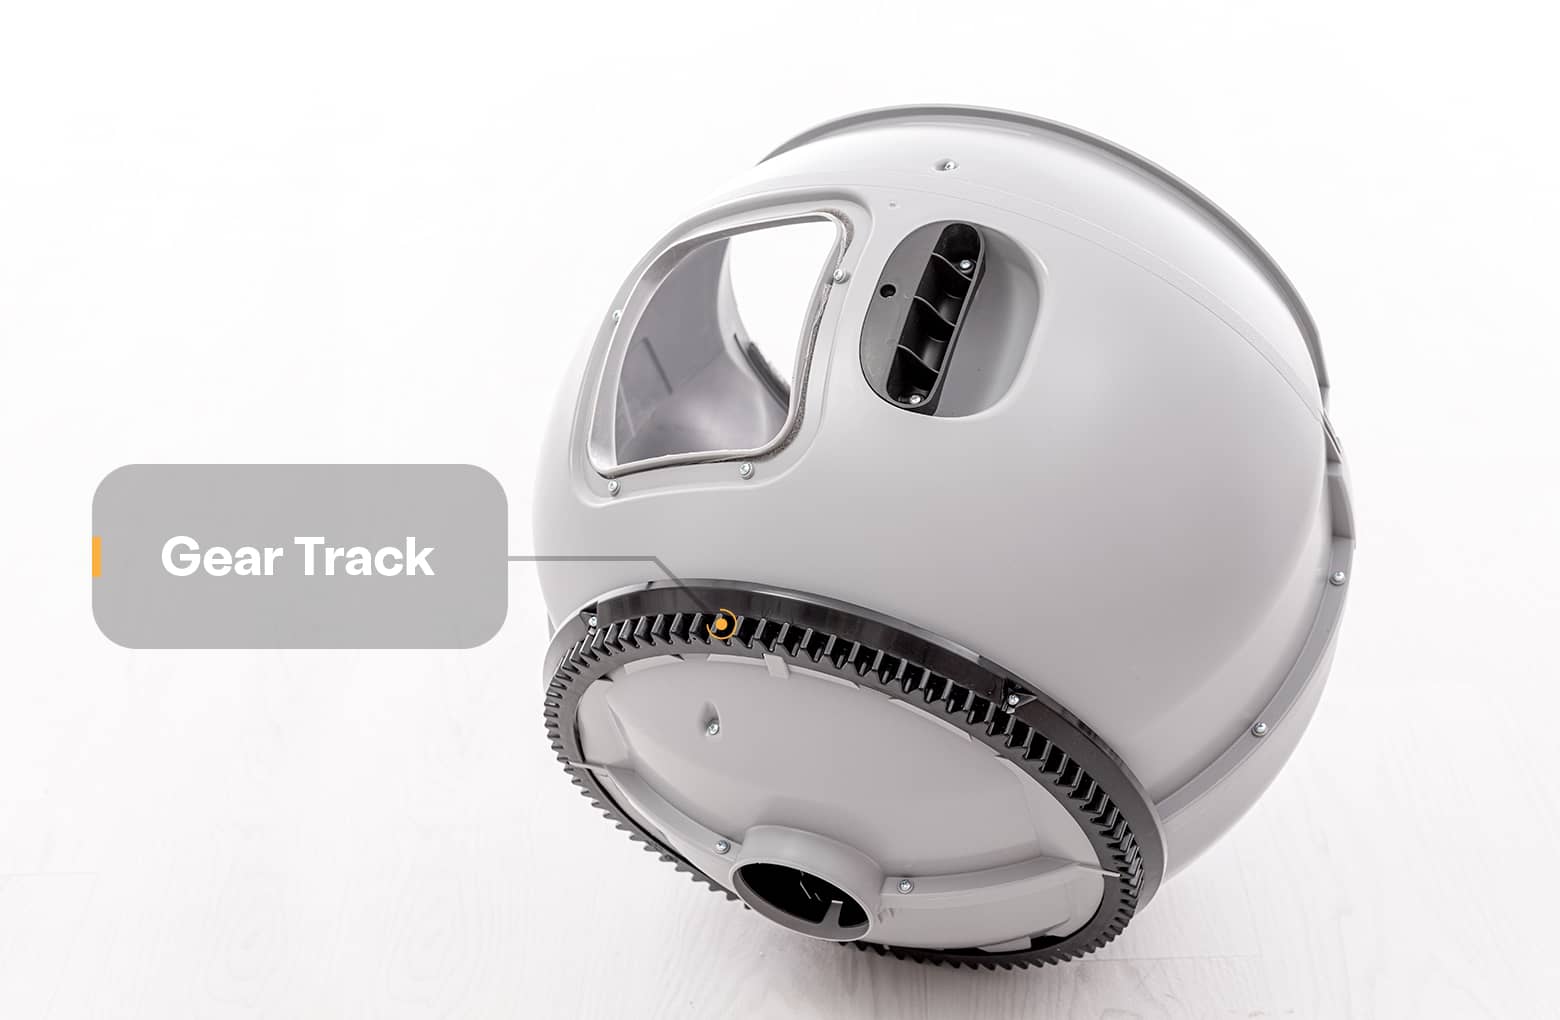
- The large black gear on the rear of the globe should easily engage with the smaller white drive gear in the base.
![]()
Installing the bonnet
- If the bonnet was completely removed, rotate the bonnet upward and align the hinge feature of the bonnet at the back of the base.
![]()
- To close the bonnet, rotate the bonnet downward over the globe, applying slight inward pressure at the latches to align the bonnet within the base. You should hear the latches snap into place.
![]()
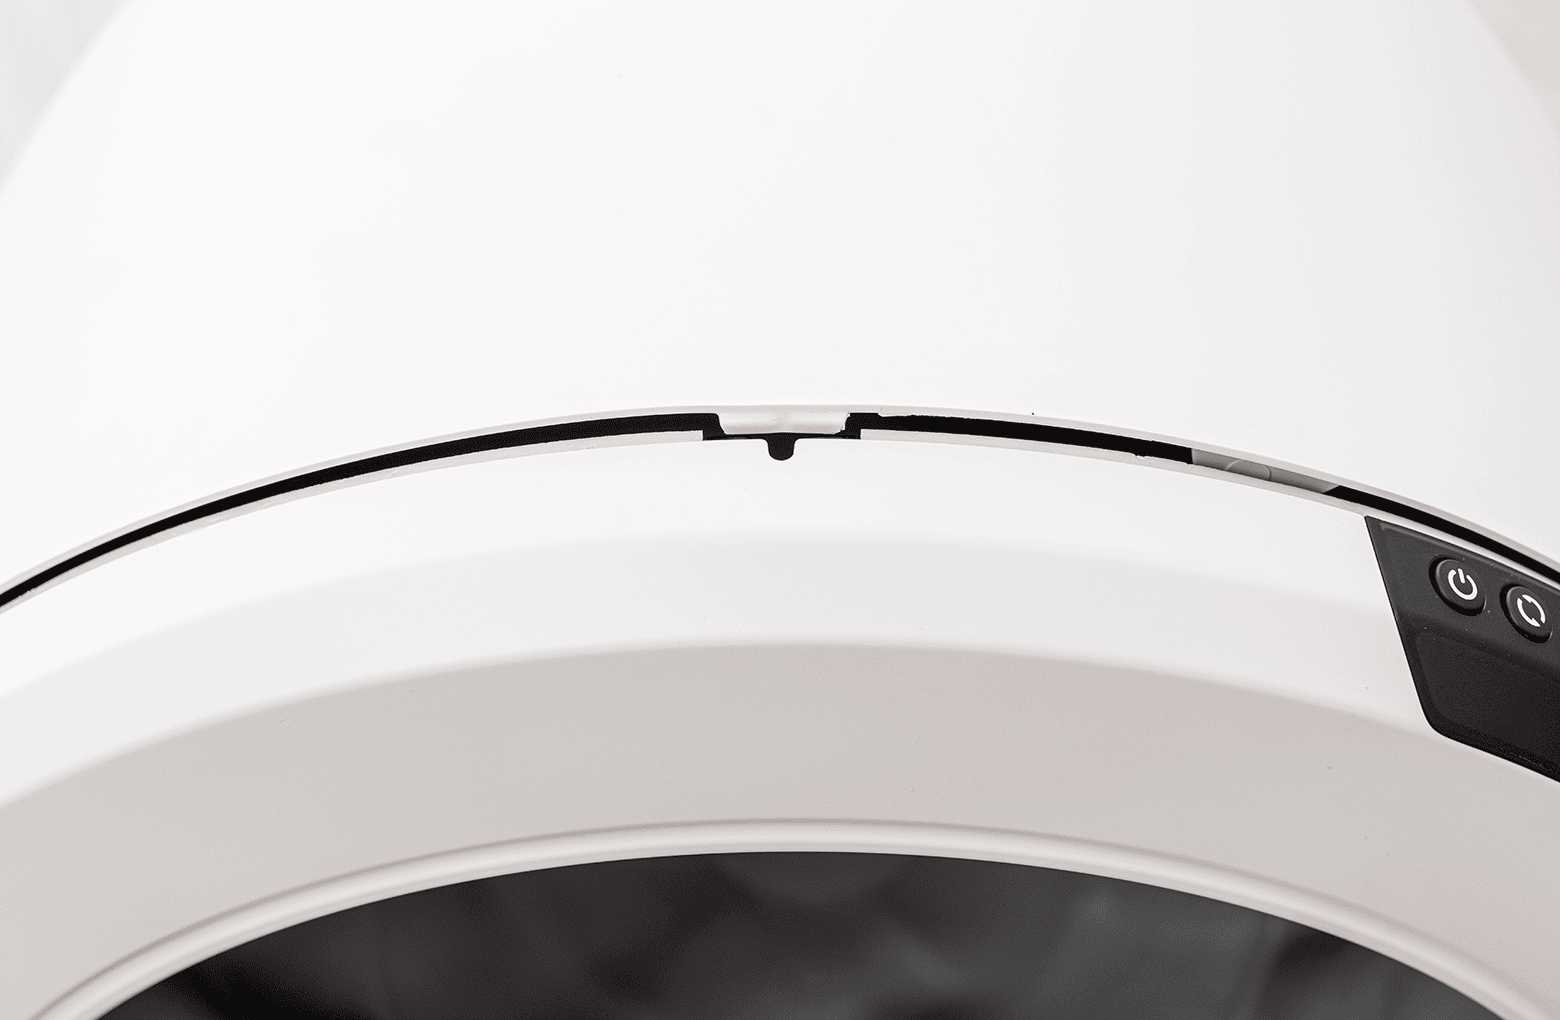
- Check to make sure the center tab at the top of the bonnet is secured in its pocket by pushing down on the bonnet at the tab location.
![]()
Final steps
- Reinstall the fence by snapping it onto the bezel at the globe entrance.
![]()
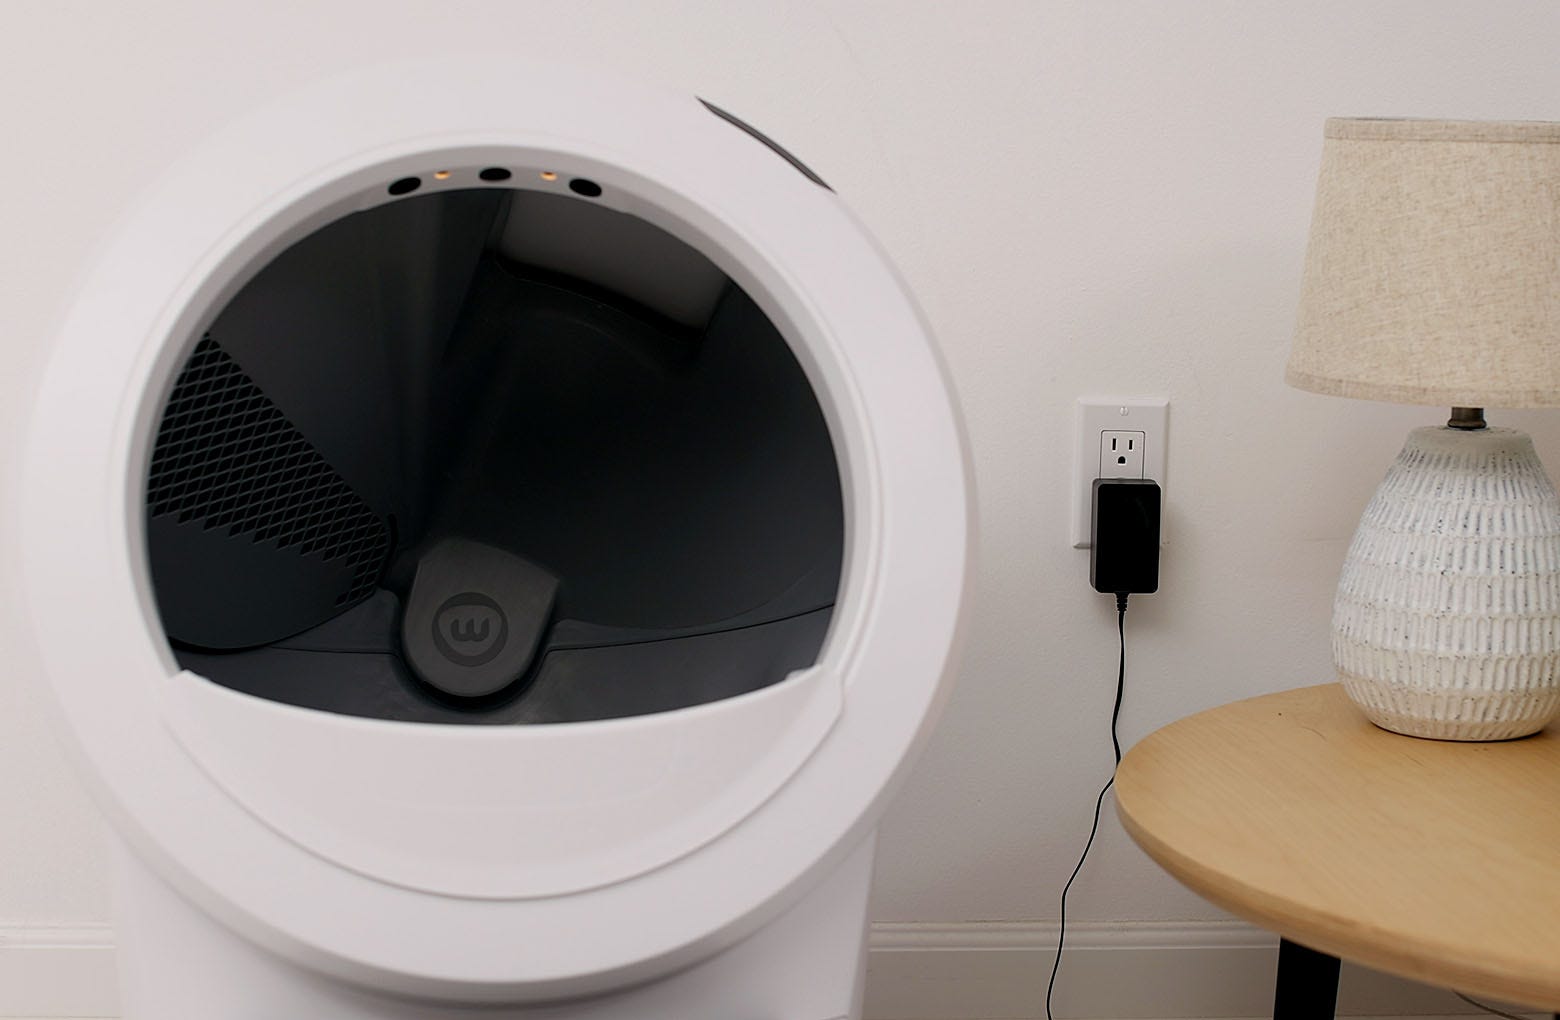
- Plug the unit in and power it on.
![]()
- The Litter-Robot will then perform a Clean cycle and return to the Home position with a blue light bar.
Successful: If your unit returned home and displays a blue light bar, you've been successful.
Unsuccessful: If you are still seeing a yellow ping-pong light bar, there's likely an issue with your Litter-Robot.
Need Technical Support?
Our Troubleshooting Wizard will solve most issues and is the fastest way to get help.
Troubleshooting Wizard
Didn't find what you're looking for?
Phone and Chat support available Mon-Fri: 9AM-7PM EST and Sat: 9AM-5PM EST, or submit a ticket anytime.